DS 3: Temporary puncture repair kit / Checking/adjusting tyre pressures
DS 3 2016-2026 Owners Manual
The compressor can be used, without injecting sealant, to check and, if necessary, adjust the tyre pressures.
- Remove the valve cap from the tyre and keep it in a clean place.
- Uncoil the pipe stowed under the compressor.
- Screw the pipe onto the valve and tighten firmly.
- Check that the compressor switch is in position "O".
- Fully uncoil the electric cable stowed under the compressor.
- Connect the compressor's electric plug to the vehicle's 12 V socket.
- Switch the ignition on.
- Start the compressor by placing the switch at position "I" and adjust the pressure to the value shown on the vehicle's tyre pressure label. To deflate: press the black button located on the compressor pipe, near the valve connection.
 If after 7 minutes the
pressure of 2 bar is
not reached, the tyre is damaged; contact
a dealer or a qualified workshop for
assistance.
If after 7 minutes the
pressure of 2 bar is
not reached, the tyre is damaged; contact
a dealer or a qualified workshop for
assistance.
- Once the correct pressure is reached, put the switch in position "O".
- Remove the kit and stow it.
- Refit the cap on the valve.
 Should the pressure of one
or more tyres
be adjusted, it is necessary to reinitialise
the under-inflation detection system.
For more information on Tyre under-inflation
detection, refer to the corresponding section.
Should the pressure of one
or more tyres
be adjusted, it is necessary to reinitialise
the under-inflation detection system.
For more information on Tyre under-inflation
detection, refer to the corresponding section.
 Repair procedure
Do not remove any foreign
bodies (e.g.
nail, screw) which have penetrated into
the tyre.
Park the vehicle without obstructing traffic
and apply the parking brake...
 Spare wheel
Scan the QR Code on page 3
to view
explanatory videos.
For more information on
the Tool kit, refer
to the corresponding section...
Other information:
DS 3 2016-2026 Owners Manual: DS CONNECT NAV
GPS navigation - Applications - Multimedia audio system - Bluetooth® telephone The functions and settings described vary according to the vehicle version and configuration, as well as the country of sale. For safety reasons and because they require sustained attention by the driver, the following operations must be carried out with the vehicle stationary and the ignition on: Pairing ..
DS 3 2016-2026 Owners Manual: Lighting dimmer
This system allows the brightness of the instruments and controls to be adjusted manually to suit the ambient light level. With BLUETOOTH touch screen audio system Press on the Settings menu. Select "Display". Adjust the brightness by pressing the buttons. You can also switch off the screen: Select "Turn off screen". The screen goes off completely. Press the screen again (anywh..
Categories
- Manuals Home
- 1st Generation DS 3 Owners Manual
- 1st Generation DS 3 Service Manual
- SCR system
- Headlamp beam height adjustment
- Child lock
- New on site
- Most important about car
Digital instrument panel
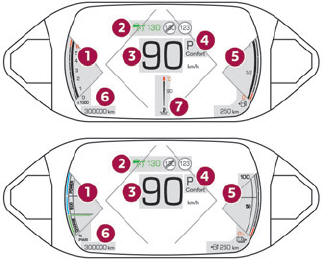
This digital instrument panel can be customised. Depending on the display mode selected, certain information is hidden or presented differently.
Copyright © 2026 www.ds3manuals.com